What’s in my Ski Mountaineering Pack?
March 1, 2024 | Posted in: Uncategorized
Ski mountaineering has become a buzzword of sorts over the past few years. From the rise of YouTube channels dedicated to documenting ski mountaineering to Cody Townsend’s Fifty Project, it’s no surprise that more people are further educating themselves about backcountry travel and pushing their skills into more technical and committing terrain. With these bigger objectives often comes the requirement to bring more gear. Whether you are advanced and proficient, new and eager to learn, or somewhere in between, it’s essential to pack properly, bring the right gear, and be prepared.
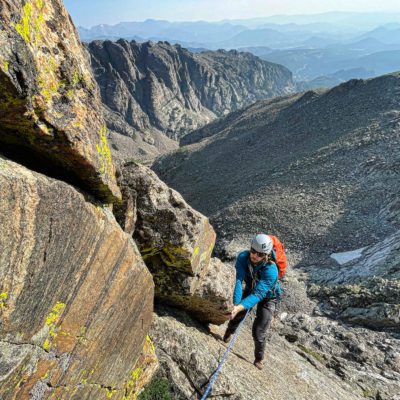
Growing up in Crested Butte Colorado, I could ski as early as I could walk. In high school, I started venturing into the backcountry after taking my first avalanche course, which rapidly developed into a voracious appetite for skiing powder, especially during my time at college in Bozeman, Montana. I started teaching avalanche courses during college, and upon graduating in November, I immediately knew that my winter was going to be spent ski guiding and teaching courses. This, of course, stuck my foot in the door of ski mountaineering, and as soon as I rappelled into a line and pulled the rope, I knew I was hooked.
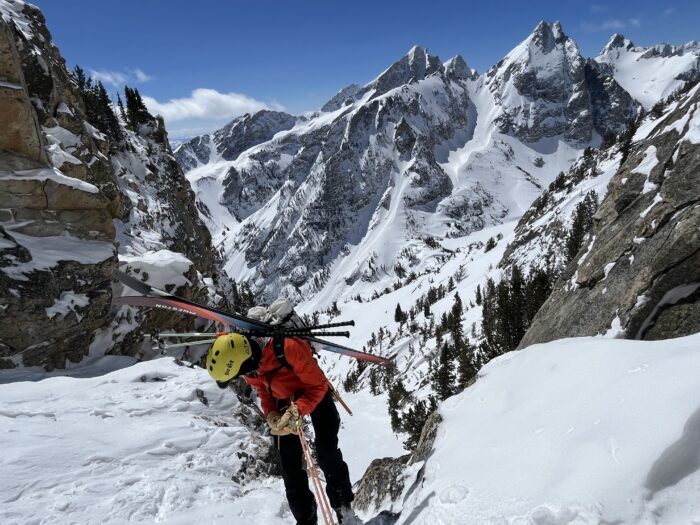
My goals quickly transformed into skiing and guiding Washington’s volcanoes, namely Mt Rainier and Mt Baker, and once I had accomplished these I only wanted more. Now, years later, I am still enamored by the world-class skiing and technical routes of the Tetons, spending as much time there skiing and guiding as I can.
Sure, the allure of ski mountaineering is potentially that it is so “extreme” and it looks cool to rappel into a steep and committing line, but what really sealed the deal for me was the feeling of freedom that these more advanced travel techniques provided me. I finally felt that I could go anywhere in the mountains with more margin, bail more easily, and overall just had more tools in my bag to access exciting and challenging terrain without necessarily accepting an inordinate amount of new risks. All of this is to say, while I am going to focus on the gear in this post, while it is shiny and exciting, wit is all useless if you don’t know how to use it properly or how to get yourself out of a jam with it. I can’t recommend taking an intro to ski mountaineering course enough, and to practice your knots and your systems beforehand so you can troubleshoot effectively.
What should I pack for a 1-day ski mountaineering day?
“Look good, feel good, ski good”. This moniker may seem silly or pretentious, but in reality it holds a fair amount of truth. If your gear is a mess and falling off of/out of your pack on the ascent or descent, you won’t be able to put all your focus into what you’re skiing, assessing conditions, and ensuring that you are making smart and informed decisions in your travel. As we love to say, if you look like Frodo Baggins on the approach, you’re certainly going to have an adventure, but it might not be the kind you’re anticipating. All of this starts with your backpack.
Hard Goods
Backpack
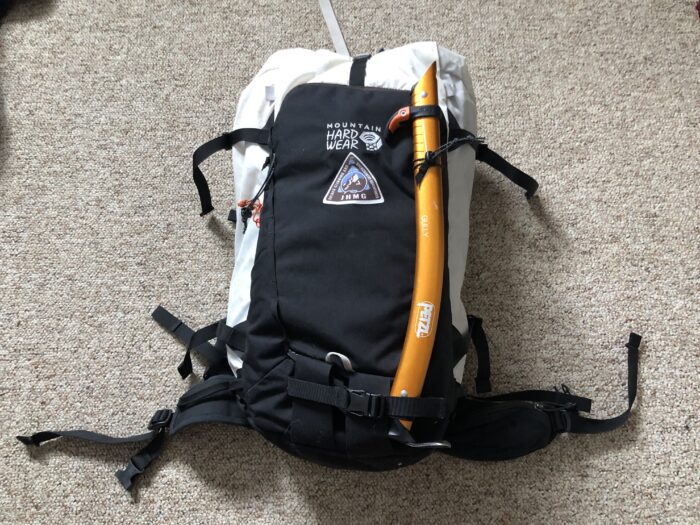
This pack needs to be a dedicated backcountry ski pack with a rescue tools pocket, loops pre sewn and intended to carry ice axes, and a ski carry system. My pack of choice is the Mountain Hardwear Snowskiwoski. At 40L it is the perfect size to carry a full kit for the day, not so small that you have to make it burst at the seams, but not so big that you can talk yourself into carrying too many unnecessary items. I have even done 5 night overnight ski trips out of this pack, so it is certainly possible to stretch this pack for a variety of uses.
Harness
It doesn’t need to be comfortable. In most ski mountaineering, we are just doing a handful of rappels, so a big comfortable harness is unnecessary. There are tons of mountaineering harnesses on the market right now, pick one that suits your needs, and most importantly, decide if you want a true belay loop or a butterfly style harness.
Ice Axe
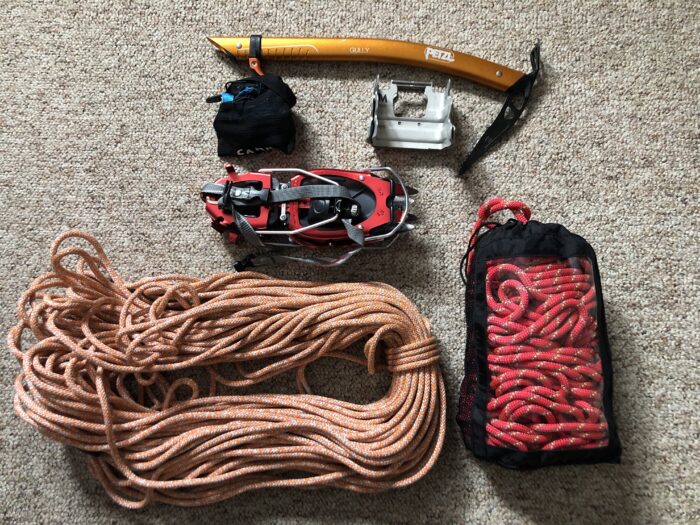
What kind of ax you bring depends on how technical your objective is, if you’re ice climbing, etc. At the end of the day, a lightweight mountaineering ax with a relatively short shaft (~45cm) will be a good start for an all around ax, I recommend an ax with a steel head, however, as aluminum headed axes quickly deteriorate and are useless when it comes to any sort of ice. I personally use a Petzl Gully on the majority of my ski mountaineering objectives.
Crampons
For most ski mountaineering objectives that don’t involve ice climbing, fully automatic aluminum crampons are the spikes of choice. Steel is too heavy, and a fully automatic crampon will attach to your ski boots the most securely. The CAMP XLC Nanotech Crampons have been my favorites the past few years, but the Petzl Leopard Crampons are also the choice of many of my co guides. In addition to boot crampons, you’ll also definitely need some ski crampons. Make sure to get ones compatible with your bindings, and make sure they are at least a few millimeters wider than your skis.
Rope
The trend as of late has been to use progressively skinnier ropes in ski mountaineering, the current standard being in the 6mm range. These hyperstatic ropes are incredibly strong but come with their own challenges and considerations. Do some research before you buy one of these ropes. Length of rope is dependent on the objective of course, most of our guides carry 30m, 40m, or 60m ropes depending on their objective. Primarily I either carry a 60m Petzl Rad Line or a 30m Rad line, it’s so light you forget it’s in your pack, which is incredible for a 60m rope.
Additional Hard Goods
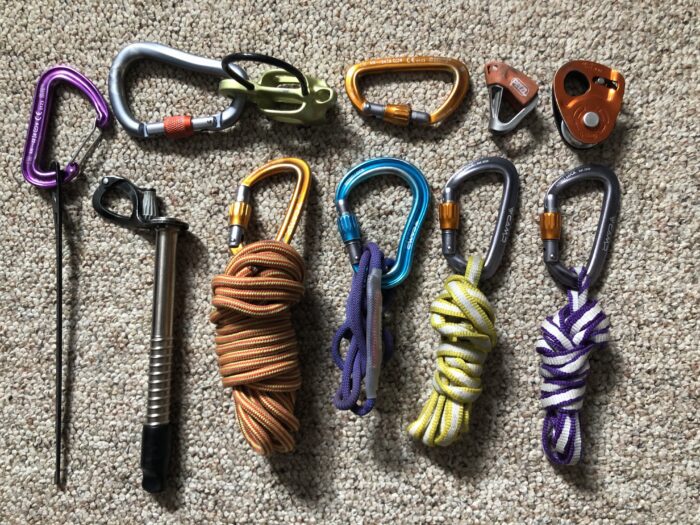
- carabiners of various sizes
- belay device
- ascender
- ice screws
Having carabiners of a few different sizes never hurts, and for ski mountaineering carrying only locking carabiners usually helps slim down the number of overall carabiners you need, and of course the lighter the better. A belay device like the Black Diamond ATC Alpine Guide (designed for use with skinnier ropes) is always necessary whenever you’re bringing a rope along as well. Ice screws are also helpful, given that there is ice along your route of course, I usually carry a 16cm ice screw and a V thread tool, so I can either place the screw as protection or V thread my way down and not lose any gear. If traveling on glaciers, I also add in a Petzl Nano Traxion and Petzl Tibloc, which aren’t critical but help streamline building haul systems.
Soft Goods
- slings
- prusik
- cordelette
A few slings (I usually carry two double lengths), a prusik loop (the Beal Jammy is great for skinnier ropes), and a cordelette (19’) will round out your technical kit, allowing you to attach yourself to anchors, extend your rappel, reascend your rope, replace anchor tat, and whatever else you may need to accomplish with soft goods and leave things behind that aren’t terribly expensive.
It’s easy to get fixated upon the shiny, clicky, pointy pieces of our kit while ski mountaineering, but the truth is we only spend a small portion of our day using these things, despite their importance. Therefore it’s critical that your pack also contains some other key items.
Mountain SOS
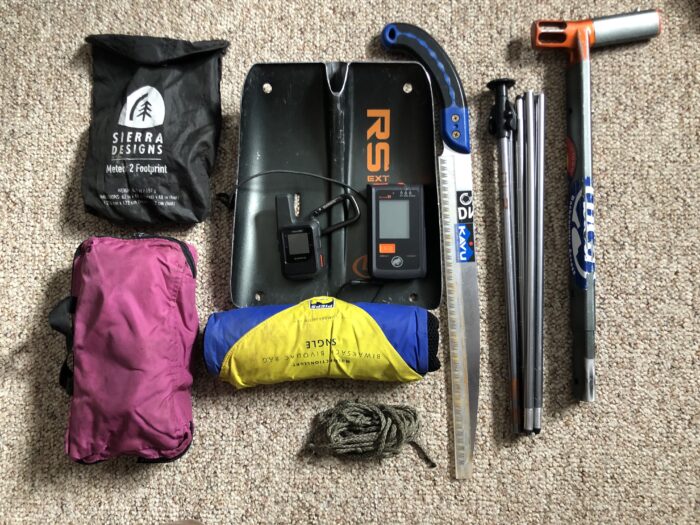
If you are ski mountaineering, odds are that your chosen objective is fairly consequential, and that means you need to be armed with the tools to be able to assess the snowpack. At a most basic level this means an avalanche shovel, probe and beacon. A snow saw and an ECT cord are also critical for snowpack assessment. Under the umbrella of rescue and emergency items are your first aid kit, repair kit, rescue sled, and InReach or satellite device.
Repair Kit
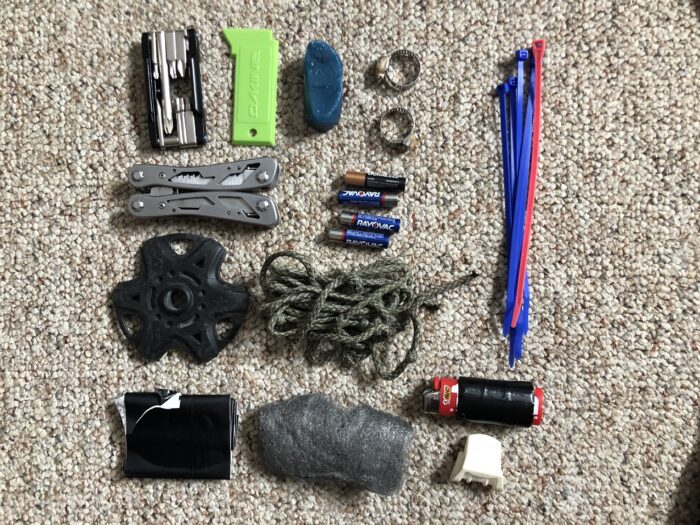
- zip ties
- super glue
- steel wool
- pole basket
- hose clamps
- binding tool
- skin wax
- ski straps
- paracord
- tape
- spare batteries
- pliers/multi tool
- extra skin clips
- lighter
- gear repair tape
- scraper
First Aid Kit
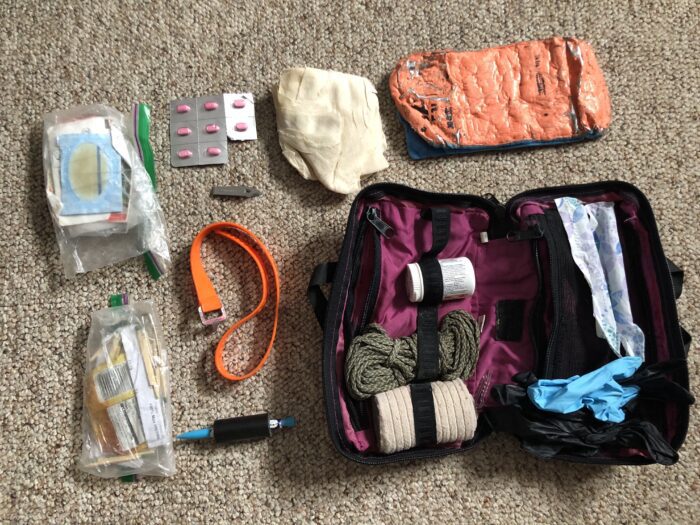
- paracord
- triangle bandages
- tampons
- sam splint (can be used to splint a broke pole as well)
- medications/pain killers
- ace wrap
- latex gloves
- matches
- lighter
- alcohol wipes
- antiseptic ointment
- band aids
Clothing
Next up, warmth! Ski mountaineering often involves longer days in the mountains and moving at different speeds, which requires a variety of layers. t. Sitting at rappel stations, flaking ropes, and even just pausing to put crampons on are all opportunities to get cold, so we recommend bringing some layers.
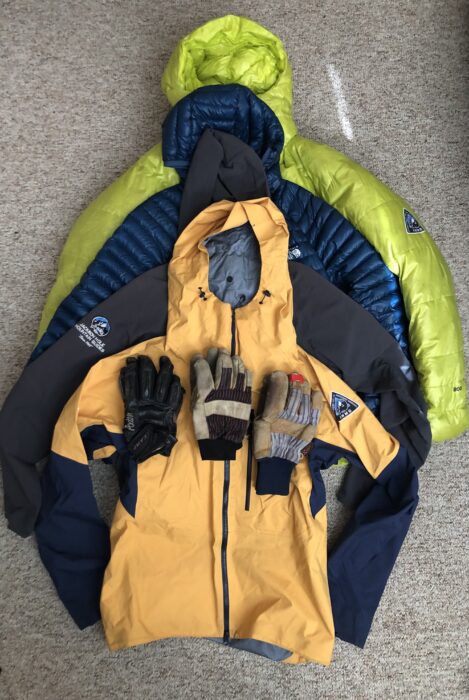
Gloves
- lightweight gloves
- mid-weight gloves
- heavyweight gloves
I like to bring three pairs: lightweight, mid-weight, and heavy. The heavy pair may never come out, but it is great to have that extra insurance and be able to throw them on after your fingers get cold gripping your ice ax or flaking a rope.
Upper Body Layers
- big puffy
- medium puffy
- soft shell jacket
- hard shell jacket
Layers will be different for everyone and their personal body temperatures, but at the end of the day having the big puffy as an insurance policy is critical (just like the big pair of gloves). The more comfortable you can stay while belaying or waiting for others to rappel, the more fun you will have on your day. I’ve found that although the Mountain Hardwear Phantom Belay Jacket takes up a lot of pack space, it has saved me on plenty of big objectives.
Other bits and pieces
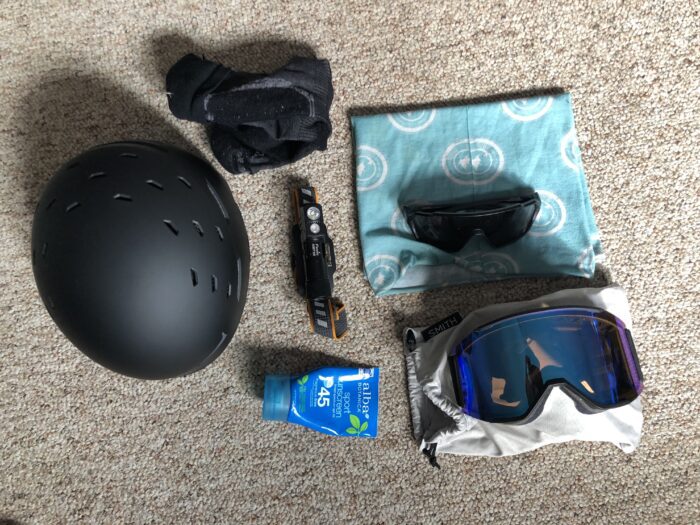
Finally, to tie up the loose ends, here are the things you’ll never be upset to have.
- helmet
- goggles
- glasses
- extra buff
- headlamp
- extra socks
- sunscreen
Helmets for ski mountaineering have been getting lighter and safer over the years as well. I used to ski in a climbing helmet, but have finally made the change to carry a bit more weight and have a MIPS helmet rated for skiing and mountaineering like the Smith Summit MIPS or the Sweet Protection Ascender MIPS.
So there you have it! That’s everything I carry in my backpack on any given day of ski mountaineering. Depending on my objective, my kit will of course vary slightly, but these are all of the core essentials. Everyone has their own approach to their ski mountaineering kit and the best part of getting into this sport is that to figure it out you just have to go skiing. Try out this setup I’ve recommended and add or subtract from it as you see fit, depending on your style and your objective.
Remember, it’s always better to have too much gear rather than too little, and start small with your objectives. Being 10 hours into a huge, technical objective with big exposure and high consequences is not the place you want to be figuring out your kit or wishing you had an additional piece of gear. Every adventure will teach you things you want to change or refine, but to begin with, starting in simple and familiar terrain will allow you to experiment with your gear more comfortably and more safely. Sure, ski mountaineering may seem glamorous and extreme, but remember, we ski to have fun, and sometimes making things extra technical can take away from that fun if you’re not prepared for it.

